Receive only Ethernet Cable
Prevent your IDS from becoming the point of attack.
Getting ready to install an Intrusion Detection System? Whether the IDS is signature based such as Snort or protocol anomaly based such as Symantec Manhunt, building a "receive-only" ethernet cable will help in limiting the IDS's exposure. If the decision has been made to have no addressable IP to the IDS machine, putting a receive only cable can help increase your stealth and decrease the potential for IDS discovery by a malicious user. If an IP address was applied to the IDS monitoring interface there is always the possibility that packet leakage may occur if the IDS machine were to request information from the DNS server or ARP for a machine in the network. A malicious user could install a sniffer on the network and monitor for packet activity from machines to get a lay of the network without performing a port scan. What if the IDS could be made to never leak packets onto the network? Ed Jowett and myself concocted the idea for this cable when we were discussing how to secure an IDS during a product evaluation. If Manhunt were to go into an environment that had access to the Internet it is possible that if the people working on the machine didn't secure the machine properly that the evaluation machine, if hacked, could pose a hacking jump point. IDS's are not immune to hacking as snort demonstrated a few months ago when an RPC vulnerability was discovered in snort. The idea of this article is that with a receive only cable, there is no way of getting a response from the host so an attack is highly unlikely to succeed. This precaution is but a layer of security and peace of mind that everything that could be done was done to prevent the IDS from performing attacks. Since the cable does not allow transmits from the IDS, the IDS could never pose a threat to the network. The steps below will help in describing the step by step process of developing an ethernet cable that only receives. Use at your own risk!
The basic configuration of pins in the RJ-45 cable is illustrated below:

| From | To |
| 1( White Orange) | 3 (White Green) |
| 2 (Solid Orange) | 6 (Solid Green) |
Follow these steps to create the receive only cable:
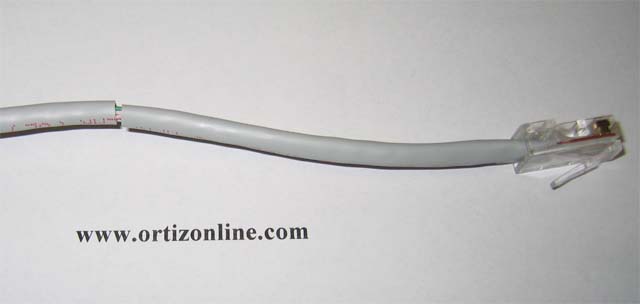
Step 1.
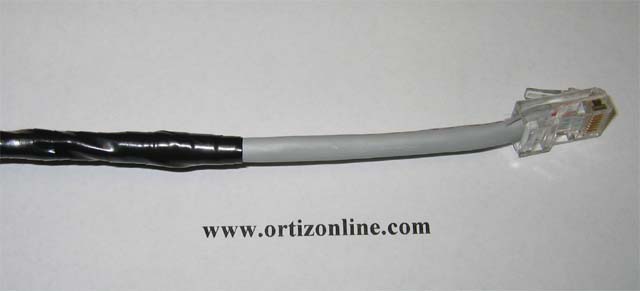
Using your favorite precision cutting instrument make 2 cuts to the rj-45 jacket approximately 3 inches from the end. The 2 cuts should be about 1 1/2 inces apart.
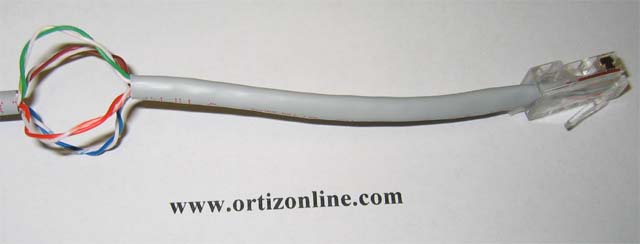
Step 2.
Remove the 1 1/2 ince excess plastic to reveal the internal cables.
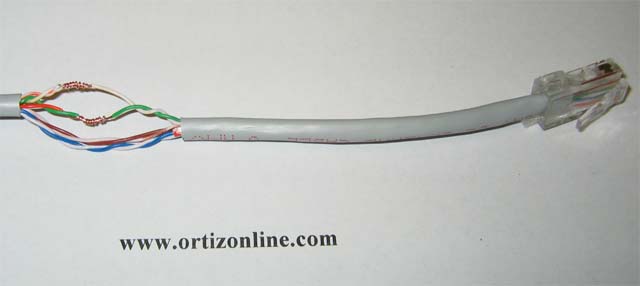
Step 3.
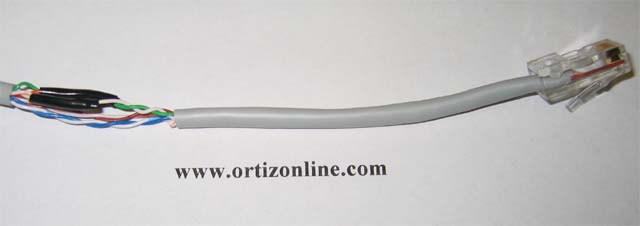
Cut the orange/white cable and the solid orange cable so that their is enough cable to wrap around the 3rd and 6th cables. The white/green and solid green cables should not be cut all the way through. The white/green and solid green cables should only be stripped to reveal the metal internal cable. The following step is to wrap the white/orange cable around the white/green cable. The second step is to wrap the solid orange cable around the exposed part of the solid green cable. Get out the old soldering gun and solder away.
Step 4.
After soldering wrap your creation in some electrical tape. Each pair should be wrapped individually first.
Step 5.
Wrap the entire section with some electrical tape again.
Afterthoughts
If you have the patience and the inclination to make a prettier looking cable I suggest some shrink tubing and that the RJ-45 end be put on after the cables have been soldered apart from each other by about 4 inches.The grey casing could be removed to allow easy access to the inside and when complete the grey casing could be slid back on. The shrink tubing could be warmed up to wrap around the cut and the rj-45 end could be put back on with only a shrink tubing as evidence that anything was ever done to the cable.
By Efrain Ortiz & Ed Jowett
Comments? Questions? Rants? Raves? Please send to the number6 at ortizonline dot com
|
|
|
|
|